Sunday, September 23, 2012

Neo-Retro Caprese Salad


Tomato season is drawing to a close here in Wisconsin.  But it's not over quite yet.  There is still time, so take advantage!

We picked up some fresh mozzarella and basil at the farmer's market yesterday.  And I picked a couple of tomatoes this afternoon while the rest of the family was out on a walk around the block.  We always like Caprese salads in the summer, but with a couple of new toys, I thought I'd try to dress it up a little this time.  Sliced tomatoes, salt, pepper, basil, olive oil powder, and a mozzarella balloon filled with garlic air.  I almost lost the mozzarella, but once I figured it out, it worked pretty well.  They stayed inflated too.  Just one more awesome way to use my whip.

I hear this is the way Thomas Keller serves a Caprese at the French Laundry.  Though I've not been there to say for sure. 

Caprese Salad: Heirloom Tomatoes, Basil, Olive Oil Powder, Mozzarella Balloon, Balsamic
Olive Oil Powder

Plating: Pre-Balloon
Plating: Post-Balloon
Alternate Plating

Monday, September 17, 2012

Kitchen Chemistry 101: Meat Glue and Other Powders of Powers.

When I am able to break away from the office for 'lunch', I usually head to the Y for a quick workout.  Out of the 23 (or thereabouts) treadmills they have, there are two that allow you to plug in your ipod and watch videos on the screen.  I am always disappointed when I can't get one of these, but when I do, I spend my running time watching the Harvard lecture series on Science & Cooking.  If you have not watched it you should.  Watching a lecture about food while on the treadmill may seem counterproductive, but certainly no more so than watching a video about treadmills while eating.  Also, it gives me ideas.

Last Monday, I started Wylie Dufresne's lecture on Meat Glue Mania.  I think you know where this is going.

On Friday, my order of Meat Glue showed up.


And Saturday, I had appetizer duty at our monthly gathering for food and games.  The timing couldn't have been better.

Meat Glue is, in case you were wondering, used to glue meat together.  It is an enzyme that creates covalent bonds with the proteins in meat and can be used to bond two pieces of meat together into a single cohesive piece (Thank my free Harvard education for that knowledge).  The proper name is tranglutaminase, but meat glue is more fun, and perhaps less scary sounding.  It is commonly used in restaurants to create perfect portions of meat that appear to all but the most astute observer to be a single continuous piece of muscle.  That nice thick rectangular piece of fish on your plate...well, let's just say fish aren't naturally rectangular shaped.  Also scallops and fillet mignons aren't born wrapped in bacon, even if they should be.     

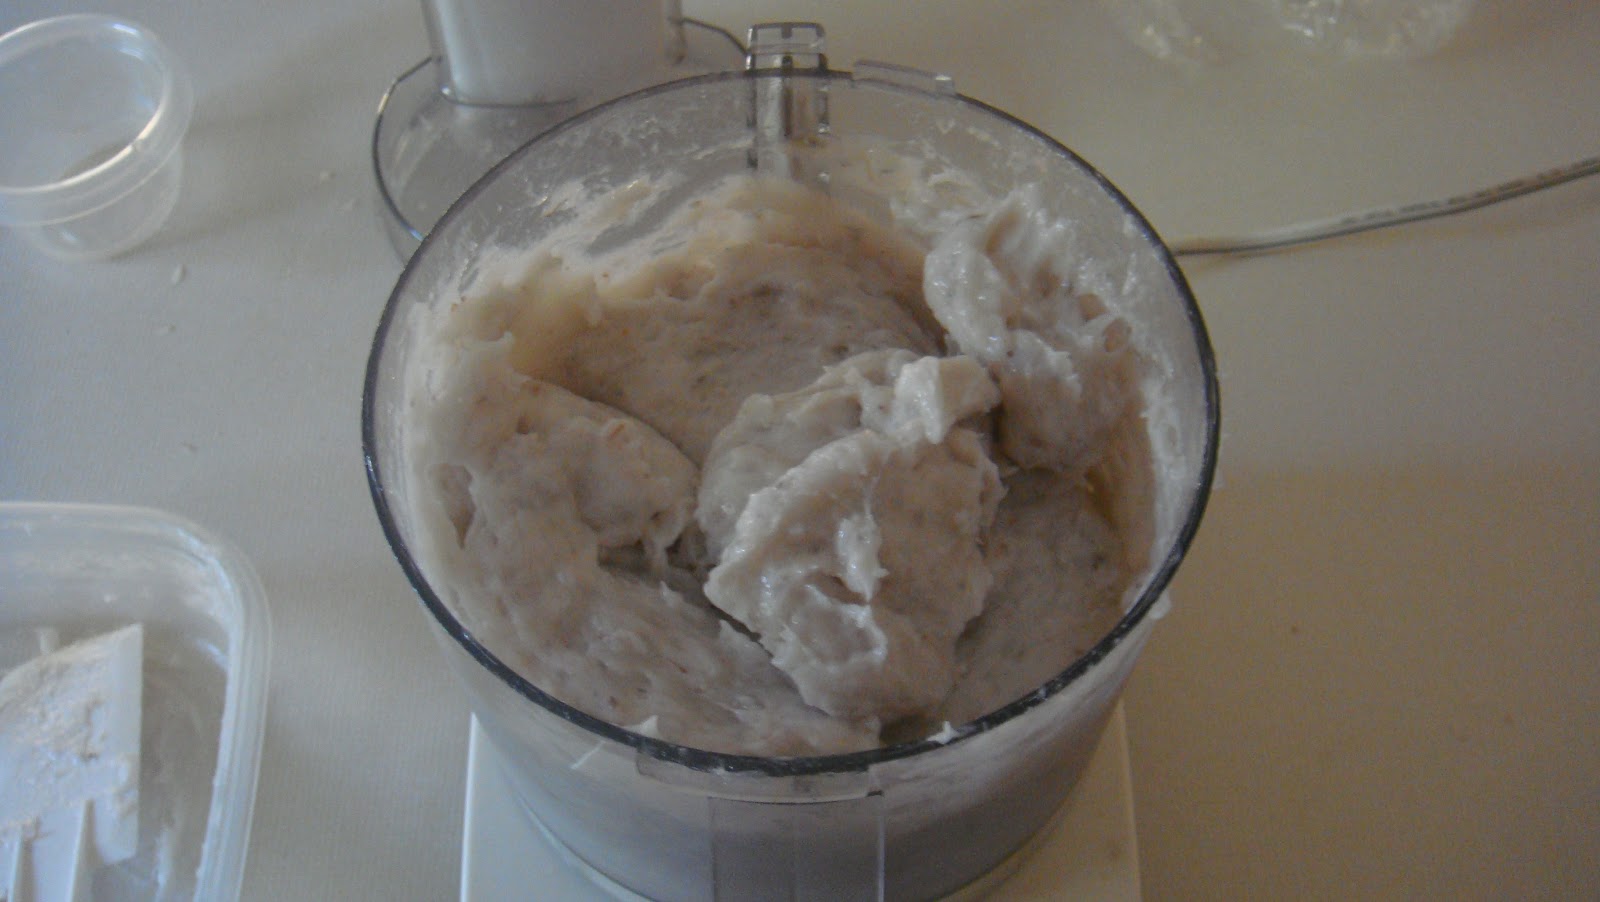
Anyway, one of the most famous and perhaps less obvious uses of meat glue is Chef Dufresne's Shrimp Noodles.  Watching the lecture, it didn't seem so hard.  Buy shrimp.  Peel (use the shells to make a nice stock) and devein.  Put in freezer until very cold but not frozen.  Put into food processor and (this is the part where the squeamish should look away) blend into a paste.  Add a small amount of salt.  Add even less meat glue.  Process until well mixed.  Pass through a very fine sieve (I had to give up on this step as my sieve was too fine to get the shrimp goo to pass through).  Fill syringe with shrimp paste place tip into a 138 F water bath and extrude the contents into a continuous strand.  As the paste leaves the syringe and hits the warm water it will instantly bond to itself, forming a shrimp noodle.  Let sit in the bath for a few minutes (long enough to refill the syringe), then remove.  Voila....Shrimp Noodle.  No pasta in this pasta.  This noodle is nearly 100% (well 99%) pure shrimp.  
Fresh Shrimp...Ready...Set...Go!
1.25# of Fresh Shrimp Paste
Loaded Syringe

Extruding the Noodle.
More Extruding...more blur.
One Noodle
The First Noodle...6 more to go.
Making Stock - Shrimp shells, carrot, celery.
Shrimp Stock....smelled good.
Surprisingly, this all worked really well.  I now had shrimp noodles ready for the final dish.  I didn't measure the length, but each noodle was probably somewhere between 6 to 8 feet long.  They were a little thicker than I would have preferred due to the nozzle on the syringe, but that was ok.  It was slightly thicker than udon noodles, but a reasonable approximation.  The theme of the night was Thai, so my concept was Shrimp Noodles with a variety of Thai flavors around the plate to mix and match.  I pickled some radish and carrots.  I chopped some scallions.  Roasted garlic.  That was the easy part.

In addition to my meat glue, I had also received several other magical powers I wanted to try out.  (Powders of power! Powders of Power!  You guys, I've been saved by my Powders of Power!)

First up was N-Zorbit M.  I don't know a lot about this other than it is basically a starch (like corn starch) made from tapioca.  It is interesting because it absorbs fats and oils and turns them into a dry powder.  This powder then immediately turns back into a liquid in the presence of water.  So, take a product that has high fat or oil content and little to no water, preferably one that works in Thai cuisine, like peanut butter.  Place in food processor with the N-zorbit M.  Pulse until it creates a very fine light powder.  Peanut butter powder.  If you take a spoonful and put it in your mouth, the dry powder will immediately turn back into peanut butter.  It looks dry, but it doesn't taste dry at all.  Once again, this worked better than I could have hoped and I had this freakishly cool peanut butter powder.

Peanut Butter
Peanut Butter Powder
Finally, I had some Kelcogel F.  This is a gellan gum thickening agent that as I understand it, works like gelatin, only it doesn't melt when it gets hot.  I wanted to make a hot foam, and thought that this could help stabilize it.  I heated up some coconut milk, added lemongrass and allowed it to steep.  Then I pureed red pepper and basil and added it to the coconut milk.  I strained it and it was ready to add the gellan F.  I had no idea how much to use, so I just sprinkled a very small amount into the hot coconut-basil mixture and hoped for the best.  When I saw it begin to thicken I poured it into the whip and charged with nitrogen.  Shook it up and hoped for the best.

All the ingredients were packed to take over to dinner.  When we arrived I heated up the stock and dropped in the shrimp noodles.  I pressed a clove of fresh roasted garlic onto the center of each plate.  Then the radish, carrot, and scallion were arranged around the edge along with a lime wedge.  When the noodles were heated, I added 1 noodle to the center of each plate, on top of the garlic.  Then I added a dollop of hot coconut-basil foam.  (It worked-kind of....it came out as a foam and was definitely still hot, but it cooled quickly and solidified into a spongy coconut-basil pillow - kind of like the consistency of the inside of a marshmallow if it wasn't sticky).  That wasn't necessarily the intent, but at least it didn't melt into a puddle.  Finally, I sprinkled a bit of the peanut butter powder on top of the noodle.  Dish served.

The Final Dish: Thai Shrimp Noodle

I think it turned out pretty well.  Definitely some things I'd tweak the next time, but overall, the flavors complemented each other and nothing completely fell apart from the plan.  The noodle had the appearance and texture of a noodle, and tasted exactly like shrimp which was the intended effect.  The basil foam was a little heavier than I intended, but the flavor was good.  And honestly, the presentation wasn't quite the way I had pictured it (ok, the noodle looked somewhat intestinal), but oh well.  For a first attempt at modern cuisine and my new stash of magical powders, I'd go as far as to say it was pretty alright.  Plates were cleaned, so success!


Wednesday, September 5, 2012

Umamique (Pronounced U - Ma - Me - Cue)


I've been planning to do another dinner for a while now.  Been working out the menu, revising it, adding new dishes, replacing others.  It's looking pretty good.  And was supposed to be my next big cooking extravaganza.  But this is not that dinner.  This is a replacement.  A substitution.  An emergency back up of sorts.  Jamie told me on a Thursday that she had invited friends over for the following Saturday ( a scant 9 days away) with promises of dinner.  That was nowhere near enough time to get all of the things I needed for my original menu.  Besides that, we were going to be gone for 4 days in the interim and had activities the Thursday and Friday nights before everyone was coming over, so I knew prep time would be limited.  Jamie suggested we just cook burgers.  Although that didn't seem too exciting, it sounded like it might have to do.  Besides, I had just read an article about how Wylie Dufresne had lost a burger contest (Burger Bloodbath 2012) with his seaweed burger.  He didn't even place.  That settled it.  Dinner would be burgers, and the burgers would be seaweed burgers.

To hear Chef Dufresne talk of the seaweed burgers, was to hear him speak lovingly of the big vicious gut punch{1} of umami they delivered.  Not only would I celebrate this magical 5th taste in the burgers, but the entire menu for the cookout would deliver a level of umaminess that I feared Northwest Wisconsin really wasn't quite prepared to handle.

So, my thoughts turned to other dishes.  Thematically, I wanted to represent the typical backyard barbecue ingredients, but ramp up the umami factor.  The problem was, I really didn't know what I meant by that.  So I took some summer cookout staples and some staples of Japanese cuisine (Because, you know, the Japanese invented umami{2}) and threw them together to see what would happen.  I'd call it Umamique.  The Umami - Barbeque.  Even though 'barbecue' is typically spelled with a 'c', 'barbeque' is also technically correct and I think the 'q' works better.  I'm making up words here, so I took a few liberties.  Where I really took liberties was in referring to this as a barbecue at all, when it is really just a cookout, and nothing was truly barbecued at any time during the event.  Grilled, yes.  Barbecued, no. 

So, summer cookout.  Burgers.  Chips.  Sweet Corn.  Watermelon.  Carrots.  Cucumber.  Green Beans{3}.  We'd already established seaweed burgers.  So what to do about the rest of the list?

Burgers:  Thanks to Chef Dufresne for this.  5 Ingredients:  Beef Short Rib, Beef Chuck Steak.  Shio Kombu.  Milk Powder.  Salt.  4 of those I can handle.  Take a guess which one I needed help with.  If you said milk powder, you'd be wrong, though it is a curious addition.  Apparently the milk proteins help the patties stick together.  Add that to your bag of tricks.  It works.  Anyway, the bogey in my culinary repertoire was Shio Kombu.  Shio kombu, as I learned, is basically preserved kombu.  Kombu as I learned is seaweed (somewhat obviously since they are seaweed burgers).  I believe that it is kelp, but I'm not really sure.  Once you have kombu, you cook it for a long time in sake, mirin, rice vinegar, sugar, and soy sauce until it is extremely tender.  This takes a while as kombu is described as leatherly to start with.  Anyway, I have soy sauce, sugar, and rice vinegar.  No sake on hand, but that's easy enough to get.  I also need mirin and kombu, but these should be easy enough to get at my local Asian grocery store.  They've helped me out many times in the past.    

Chips.  Chips are really just a snack.  Chef Adria always liked to start off his meals with some snacks.  So chip=snack=appetizer.  Japanese appetizer=edamame.  I thought I'd treat edamame as a chip.  Take the shelled edamame, add some olive oil, cracked peppercorn and salt and roast it in the oven.  I'd seen this basic concept on pinterest so I had a good idea that it would work and it was easy.  Check chips/snack. 

Sweet Corn.  Corn on the cob is good, but not very Japanese.  Corn also goes well in soup.  Japanese miso soup is delicious.  So the next course would be sweet corn miso soup.  I've never made miso soup before, but what better time than now to try.  I knew the basics.  Dashi.  Miso.  Other Stuff.  Sounds pretty easy.  Three basic ingredients.  Let's work backwards.  My other stuff would be fresh sweet corn, mushrooms and scallions.  I also planned to poach an egg in there, but ended up pulling that out at the last minute in deference to the growing size of the meal.  But I'm getting ahead of myself.  Miso.  I've been wanting to make my own miso, but no way to do that here.  No problem though, I could pick this up at the Asian market.  Dashi.  Dashi is basically a broth made from steeped seaweed (That seaweed being kombu.  Ding ding ding...I already knew I needed this for the burgers) and bonito flakes.  A little research told me the more proper term was katsuobushi which is actually the dried fermented shavings of the bonito fish.  I gave myself points for knowing bonito anyway.  Another item for the Asian grocer.      

Watermelon.  Not really umami, but a refreshing summer fruit and the CSA has been keeping us well stocked in watermelon this year.  I thought this would be a nice palate cleanser between the snack/soup starters and the main dish.  Also, I have been preparing for my Next meal and reading about kaseiki.  This would be a chance to do a plated dish with nice presentation.  A contrast to the typical western cookout, these would (in theory anyway) be small bites, somewhat intricate, and beautifully composed on the plate.  I'd do a trio of watermelon.     

Carrots, Cucumber, Green Beans:  These would be the sides.  Carrots with miso butter (aka Asian cheez whiz).  Pickled cucumber salad, sesame garlic green beans.  Nothing too complex here, but strong flavors that should hold up next to the burger.

I graciously (somewhat regretfully even though I was grateful not to add to the already substantial list of dishes) gave up dessert responsibilities and asked Jamie to cover beverages.

I also decided that rather than burgers, we'd do sliders.  Basically the same thing, but smaller so that the guests could have more than one.  Or, if they were not very good (a distinct possibility) guests wouldn't have a giant burger to try to discretely dispose of.  Mostly though, I liked the sound of Seaweed Sliders better than Seaweed Burgers.  

Menu concept complete.  On to execution.

Friday night I stopped off at the Asian grocer on my way home from work.  We were going out with friends that evening, but I wanted to get my ingredients so they'd be ready to prep on Saturday morning.  I had my list.  Miso, Kombu, Katsuobushi, Mirin.  I assumed that if these were things that I needed with my cursory understanding of the cuisine, they must be common.  Oh, if that were only true.  Miso I found, but no dice on the rest of the list.  Not only that, but they didn't even know what the other ingredients were.  That's ok, because really, neither did I (except for mirin which I knew vaguely was a sweet cooking sauce, and was especially surprised they wouldn't have on hand).  Anyway, this was not looking good. I was out of time and friends were waiting, so I left with only the miso and a growing concern that this wasn't going according to plan.

I got up early on Saturday (well same time as usual, but early for Saturday) and headed off to the farmer's market to get the necessary produce.  Then I planned to hit the other Asian grocers in town to get the 3 other ingredients.  The first one I stopped at was the largest one I knew of.  No, no and no on the ingredients (though the lady I spoke to did give me a branch full of longan fruit, which I'd never even heard of but now know is also referred to as dragon's eye because it resembles an eyeball when peeled - she also said they no longer carried mirin because no one bought it).  I stopped at 4 more Asian grocers.  Two of them didn't know what I was talking about and the other 2 were closed, one of them apparently permanently.  The other closed store specializes (from what I can tell based on a couple visits, which is not likely to be entirely accurate) in Korean ingredients.  I moved on.

Out of Asian grocers I decided to go to the supermarket on the off chance they might have something, or the more likely reality that I would need to rework the entire menu concept in the next 8 hours and maybe it would bring on some inspiration.  As I was driving though, I saw the natural food store (The Free Market).  I'd been wanting to check it out, but didn't really know where it was, until now here it was, so I stopped.  Lo and behold, 2 packages of kombu (not seaweed, but sea vegetable!) and mirin.  I bought them both.  They were more expensive than they should have been, but I bought them anyway.  It was almost time for the Korean grocer to open and I wasn't yet too far away, so I figured I'd try there for the katsuobushi.  And score again!  I was on a roll.  I headed home to start cooking.

First up Shio Kombu and Dashi.  My dashi guide said 1 piece of kombu approximately 3" x 6".  The bag I bought had 1" strips, and they looked about 6" long, so I rinsed off three pieces, threw them in a pot and commenced to heating.   Meanwhile, I rinsed the remaining 1.875 packages of kombu off and set to soaking for 30 minutes in a large pot of water.  About 10 minutes in, just as the dashi pot was about to reach a boil, I realized that my 1" strips were really 3" strips.  I'm not sure by what magic this happened, but I'll say this, Hydration is good.  So, I pulled one of the 3 strips out of the dashi pot and into the kombu pot.  No problem.  Then, as it had reached a boil, I turned off the heat and threw in two fistfulls of katsuobushi.  After brewing for 10 minutes I strained it and was left with an awesome{4} dashi stock. 

Meanwhile, the Shio Kombu was fully rehydrated.  Next up I needed to add mirin, soy, sake, vinegar, and sugar.  After some debate about whether or not to keep the water already in the pot, I poured it out and added everything straight to the kombu.  Cooked and cooked and cooked adding water, in addition to more of the other liquids.  I planned to cook until tender, but the liquid level was so low, I had to keep adding water and more of the liquids.  I think I should have left the soaking water in there, but it all worked out ok.  After, about 2 hours of simmering (more than double the expected time), I figured it was tender enough. I also tasted some of the product at this point and it was really delicious, so into the food processor it went.  After pulsing into a chunky paste, I added to the ground short rib, chuck, salt and milk powder.  I mixed together by hand and made mini slider size patties, then put them into the fridge to rest, infuse, and firm up until time to go on the grill.

With the entree basically complete, I turned my attention to the watermelon.  I had 3 watermelon 'bites' that I wanted to prepare, plus I had just received the whip that I ordered in the mail and wanted to try it out, so the Watermelon Trio became a Quartet.  I cut up the watermelon trying to get 1" seedless cubes.  I saved the best cubes and juiced the rest, pushing through a fine mesh.  When I had 2 cups of juice, I heated half on the stove to dissolve a packet of gelatin.  To this I added the scraped out innards of a vanilla bean, cooled, added the other half of the watermelon juice and set aside to chill.  Then, I tackled the remaining rind.  I cut into 1" chucks with about 2/3 white rind and 1/3 pink flesh.  Made a sweet pickling solution, added star anise, ginger and the watermelon rind and simmered for a couple minutes until the rind began to soften.  Then put that in the fridge to chill.

At this point, the prep was complete.  I only had to wait until it was almost time for the guests to begin arriving to finish off the dishes, which given the length of my prep time was about 15 minutes ago, so I was ahead of schedule! 

I began toasting the edamame.  Then I threw the dashi in a pot and began heating.  As the guests began arriving, I put out the edamame snack.  I added the red miso to the dashi (actually added some dashi to the miso to incorporate than added that back to the rest of the broth).  Then added sweet corn, mushrooms and green onions.  Once all the guests had arrived, I served the soup.  It was really quite delicious. I liked the sweetness of the corn to contrast with the earthiness of the miso-dashi broth and mushrooms.  It may have been a wee bit heavy for summer.  I think a white miso would have been a little lighter for summer, but I was using white miso later, so went with red in the soup.  I think it was the right choice.


Next up: The watermelon quartet.  I debated if this was a salad course or a palate cleanser.  Really, it's not either, but that's ok.  I don't know why no one ever does plated dishes at home dinner parties.  Wait...yes I do.  It is basically a pain in the ass.  I like the idea of a single ingredient featured in several single bite preparations on a single plate.  Unfortunately, this basically means you are producing multiple complex{5} dishes to put out a single plate of food, and on the off chance someone likes something you served, they aren't getting any more of it.  But maybe that's why I like it.  Nothing ever tastes better after the first bite anyway.{6}  Anyway I thought I'd feature watermelon, because what's more summertime than that?{7}  Four individual bites (Pictured counterclockwise starting in the lower right).  Bite 1: Watermelon with Chevre and Pickled Blueberries.  Bite 2: Pickled Watermelon Rind with Ginger and Star Anise.  Bite 3: Watermelon with Honey Balsamic Caramel and Mint.  Bite 4: Watermelon and Vanilla Bean Espuma.  Espuma is a fancy word for foam.  Thank you elBulli.  This plate made me happy, even if no one liked it.{8}


Next up Seaweed Sliders.  I think the name might have frightened some of the guests, but they trusted me enough to try it anyway.  I actually like the name.  Better than Seaweed Burger.  More alliterative.  I had no idea if these were even going to be edible when I started, and was a little shocked at the ratio of Shio Kombu (seaweed) to beef in the final product.  Nevermind that though, they grilled up just fine, and held together pretty well (Thank you milk powder).  I served the sliders with a double condiment bar.  The first being American Burger Bar featuring homemade ketchup, homemade pickles, apricot tailgate mustard (good stuff), and sliced garden tomato.  The second was Asian Condiment Bar featuring Rhubarb-Fennel Kimchi, Sliced Pork Belly, Ginger-Scallion Sauce, and Sriracha.  Notice there was no cheese.  Chef Dufresne hates hamburgers{9}, but loves cheeseburgers, especially those with homemade American cheese.  As I wasn't able to make my own cheese in the allotted time for this dinner, my sliders were served cheeseless.  I prefer to think of it as an aesthetic choice rather than necessity, but we'll let history be the judge{10}.  Anyway, the dual condiment bars seemed to confuse the guests.  Here they had a seaweed slider that may or may not even be edible and they were presented with a nearly infinite number of choices{11} on how to dress their burger.  How were they supposed to decide?  Anyway, once the burgers had been dressed we sat down to get to eating.  The burgers were pretty darned good.  I think someone might have even said it was the best burger they'd ever had{12}.  In all likelihood, I had just set the bar improbably low with the name seaweed slider that anything halfway edible was going to get raves, but let's not dwell on that.  Burger success!


I should mention the sides. Actually, I probably shouldn't mention my sides.  Garlic green beans with black sesame.  The green beans were picked past their prime and not as tender as green beans should be.  Carrots with Miso Butter.  I intended to grill these, but didn't have room with the sliders, so I tried to bake them.  They were soft outside and crunchy inside and the miso butter didn't really melt, but didn't not melt.  Not the texture I intended on either front.  But the flavor was ok.  Both made for excellent add-ins as leftovers.

The sides I should mention were from the guests, who went above and beyond the call of duty.  Evelyn brought Tri-Color Eggs, a beautiful dish featuring eggs three ways: Salt Cured Eggs (Xian Dan), 1000 Year Eggs (Pi Dan) and just regular old eggs (Dan?).    It was delicious.  As were the Korokke (Japanese Croquettes).  Jamie made a Watermelon Sangria that was also very tasty, refreshing and more potent than it seemed.  Kim provided the finale with a Lemon Curd Freezer Pie that was a fantastic finish to the meal. 


So that's it.{13}  I'm posting the menu here for your enjoyment.  And I hope to get back to my original menu plan sometime in the near future.  But I have to say that although I didn't have high hopes for a burger cookout, it worked out ok.  I got to try some new things, some of which I'll probably do again now.


{1}  I'm pretty sure he never actually used the words "big vicious gut punch," and a little more sure that if he did it wasn't in a lovingly manner.  But I don't really know for sure. 

{2}  I don't really know if the Japanese invented umami, but I also don't know that they didn't.  When I made that statement I was really just banking on the fact that you don't know either.

{3}  I'm not sure if green beans really scream cookout, but they are in season so work with me here.

{4}  I say awesome because I really had no idea what dashi stock was supposed to look, smell or taste like, but it seemed appealing in a brothy kind of way so I figured it was probably a pretty good dashi.  

{5}  I'm not saying that anything I made qualifies as complex.   

{6}  I'm not as sure about this as I sound. 

{7}  Tomatoes.  Corn on the Cob.  Peaches.  Lemonade.  Just for starters.

{8}  Everyone liked it...I think.

{9}  I'm not sure why I know this, or even if I know this, but I believe it to be true.

{10}  This doesn't even make sense.  Why would history be the judge? If anything, shouldn't it be the future.  Regardless, Yes.  I am pretentious.  I think maybe I expected this dinner would someday be written about in the history books.  It would be pretty damn hard to provide a more thorough account than this though.  Is anyone actually still reading? 

{11}  Actually 256 distinct options if I know my math, which I might not. 

{12}  I'm not lying, I really think this.

{13} Finally.

Sunday, August 12, 2012

The State Fair, or How to Find the Perfect Corn Dog (Maybe).

After commenting on a friend's facebook post asking who was going to the state fair and why, I realized I had completely surpassed the reasonable limit for a facebook comment and then some.  I am reposting that comment in it's entirety here.  In retrospect, my first answer to the question was probably sufficient.  "I'm going because the state fair is awesome!"  But after letting that percolate in my mind for a couple days, I just couldn't let it be.  Why is the state fair awesome?  And so I unleashed the below.  Reprinted in unedited form, although I added pics.


******

Ok, I didn't have time to expand earlier, but here's why the state fair is awesome.

#1) Chicken Barn - This is the most fantastical place at the state fair. There are so many varieties of chickens. Brown Chickens, White Chickens, Black C
hickens, Blue Chickens, Red Chickens. Not only are there rows upon rows of chickens, every single last one of them is pissed off. Particularly the roosters, and they want you to know it. Once you get past the glory of the chickens, there are the duck, duck, goose, pheasant, rabbit, and other magical creatures. I particularly like the rabbits (I don't know what kind, but I think they might be Hungarian) that have floppy ears and are about the size of a medium sized dog. You see it in the cage from a distance and say Holy *EXPLETIVE*, What the *MORE EXPLETIVES* is that? It doesn't look like anything you've ever imagined a rabbit to look like. It's monstrous, and yet furry and gentle. If you have no other reason to go to the state fair, the chicken barn alone is worth the price of admission.

#2) Corn Dog Perfection - You can't walk 10 steps at the state fair without passing a corn dog stand. And there is nothing better than a corn dog at the state fair. Except, and listen to this carefully, most corn dogs you find at the state fair are completely, absolutely wretched. You will hate yourself immediately upon the first bite. Unless you find corn dog perfection. I allow myself one corndog a year, and the stakes could not be higher. I either win big, or go home disappointed and quite possibly severely immuno-compromised. Here's a couple hints on what to look for:

a) Are the corn dogs in the frier, sticks up, or are they sitting under a heat lamp? If it's the latter, keep on going. Corn dogs don't get better the longer they sit. If no one wanted that dog enough to snatch it right out of the frier, you don't want it either. If they are busy frying up corn dogs and customers are buying them as soon as they pull them from the frier, you may have a winner. But first, take a little more time to inspect.

b) Check out the dogs before they are dipped. Are they a nice dark reddish-brown color? Do they look like a hot dog you'd be happy to grill up and put on a bun? That's good. Are they grey and slimy? Probably best to keep on walking.

c) Batter consistency check: When the dip the dog and pull it out, do you see a couple bits of batter drip back down, or does the batter hold on to that dog like cement? You want a nice light batter, relatively thin coating, and bubbles you can see. If the batter looks like paste, it's not going to get any lighter when it cooks. Stay away. If the operator has to keep rotating the dog between the batter dip and hot oil submersion to keep a nice even coating, youshould start to get interested.

d) How are condiments for the corn dog made available? Are they outside the window where you can apply them yourself or do they ask what you want and make it to order? It may not seem obvious, but the answer here is that you're looking for an operator who applies your condiments for you. Typically with a stick or a brush. When you get a corndog, you want ketchup and mustard. As soon as that dog gets pulled out of the oil, ketchup should be applied. At this point, it's still hot enough to caramelize the ketchup just a little bit. Then mustard goes on the other side while still sizzling hot, evaporating some of the water and concentrating the vinegar kick.

All this, and there's still one factor that's hard to spot that can ruin an otherwise good corn dog. Time and temperature. Even if everything else is right on, if the oil is too hot, as so often happen, you'll have a great looking corn dog on the outside, but when you bite into it, there's no hot dog in the core. Instead, you've got a cold dog, or mildly warm dog. Worse yet, uncooked batter. This seems unfortunate at the moment, yet so much worse the next day. Good luck and happy hunting!

#3) The Pork Pavillion (Illinois) / Wisconsin Products Pavillion (Wisconsin): This is where you go when you're ready to eat. And let's be honest, that's the main fair activity for most of us. The pork pavillion offers a pork chop sandwich. It seems so simple, and yet so good. It's also home to the prairie farms ice cream stand. I don't know why, but this ice cream is really, really delicious. Get the peach. In the Wisconsin pavillion you have even more choices. Apple cider donuts, honey ice cream (also at the ISF, but harder to find), buffalo burritos or lamb sandwich, baked potatoes. You can't have it all, so take your time and choose wisely. Share with your friends and family, to try as wide a selection as possible.

#4) The Milk Barn: In Wisconsin you can get 25 cent glasses of milk. White milk, chocolate milk, strawberry milk, raspberry milk, cherry vanilla milk, root beer milk. Ice cold delicious milk. I can't even drink milk, and yet I do. In Illinois, you actually have to milk a cow. Milk it and you get a choice of milk or ice cream sandwich. When I was a kid we really milked that cow. We'd go back again and again. There's cheap dairy goodness to be had in the milk barn.


#5) Butter Cow. Cow made from butter. Whoever came up with this concept was a genius.

Wednesday, June 6, 2012

Strawberry Shortcake Balsamic and Fresh Asparagus with Pea Shoots. (just another Sunday afternoon experiment)

I picked up some exquisite groceries this weekend.  We stopped by a new store that just opened - Trust Local Foods.  Basically it's an outfit that connects local farmers with the areas more responsible restaurants.  They recently opened a retail outlet, so people like myself can stop by.  It's small, featuring fresh produce, patured meats, fine local cheeses, etc. etc.  All the best stuff from right here in our community just brought together in one place.  I recommend it.  I loaded up with asparagus, non-homogenized goat milk (also available in cow), pea shoots, spring grassfed butter (phenomenal), and strawberries.

Despite the overwhelming joy from eating a fresh ripe strawberry, I get pangs of sadness because so many times the strawberries you find don't even approach what a strawberry should be.  I buy grocery strawberries once in a while, and sometimes in the middle of winter even fool myself into thinking they are ok.  They're not.  Once you have a real strawberry once more, you realize what you've been missing.

I also stopped by my fishmonger to check out the selection and picked up a couple of snapper fillets.  I guess they probably weren't local, but they looked pretty good and I'm almost always pleased with his offerings, even if I did have concerns about buying fish in Wisconsin on Sunday.  It turned out to be unfounded as they were quite good on the grill.  But this isn't about the fish.


So I had this beautiful asparagus and fresh pea shoots.  I decided to improvise.  Added a little butter and olive oil to the pan and sauteed a few cloves of finely chopped garlic.  Added the asparagus and sauteed.  Threw in some pine nuts and frozen peas (blasphemy I know, but couldn't find any fresh and compared to most other produce peas actually freeze pretty well).  I added a couple squeezes of grilled lemon, then turned off the heat.  I added a couple handfuls of the pea shoots and tossed together.  Then finished with a little sea salt and cracked Grains of Paradise.  This turned out well.  Delicious in fact.  We polished off most of it that evening.  There was just enough left over to save, but Jamie raided the leftovers while I was gone the next night. 


Next, I had to do something with the strawberries.  Besides just eat them, which I had already been doing off and on for about the last 6 hours.  I had recently made a strawberry-balsamic jam that, in my humble opinion, turned out to be fairly impressive, so I thought a shortcake with that hint of balsamic to balance with the berries would be good.  I didn't have a good shortcake recipe though, and a quick search on Pinterest yielded nothing that looked exciting.  I basically ruled out anything that started with Bisquick and there was nothing left.  (Not that there's anything wrong with Bisquick, but I've had Bisquick shortcake, and it is serviceable but no better than that, so maybe there is something wrong with Bisquick.)  So I googled strawberry shortcake, finding all the normal food recipe sites.  These also had recipes that were mostly uninspired.  So I thought, if I am adding balsamic to my berries, maybe similar minded people have done the same, and they will have put the same thought into the shortcake as well.  So I added balsamic to the search string.  Right off the bat I got a couple interesting hits.  But I decided to go with this one from someone who calls herself the kitchen fiddler.

I basically followed her recipe, though the measuring cup was in the dishwasher so I had to just sort of wing it on the measurements.  Basically though this is it:  2 cups flour, 4 tablespoons sugar, 2.5 teaspoons baking powder, and 1/4 teaspoon of salt.  Mix together.  Now here's the genius of her recipe.  Cut a cold stick of butter into half inch cubes.  Add to dry ingredients and pulse in the food processer until the butter is broken down to pebble size.  Add 1 cup cream and bring dough together.  Spread into about a 1.25" tall rectangle and cut into 6 squares.  Sprinkle with sugar and bake 15 minutes at 425F.  Credit to the Kichen Fiddler because this shortcake was good.

After baking, slice shortcakes in half and fill with berries and real whipped cream (Heavy cream, vanilla, powdered sugar whipped to a moderately stiff peak is what i do)          
 

These were also Tasty. (capital T)  And I'm going to go have another one now!

Thursday, May 24, 2012

Leftover Fusion

After Banh Mi's and JG's Fried Rice, I had leftovers.  What to do....What to do.  Let's start with the pork belly.  Cut into lardons.  Place in Wokpan and heat.


Add Momofuku Ginger Scallian Sauce.


Add Rice.


Top with 2 Perfectly Cooked Eggs.


This was some mighty fine fried rice eatin.  Why do we ever get Chinese takeout?

Wednesday, May 23, 2012

Attempting The Perfectly Cooked Egg

The Perfectly Cooked Egg is not an abstraction.  It's real, and even you can do it.  Let me rephrase.  Even you can attempt it.  Cause that's what  it's all about.  The attempt.  And the eggs.  You could go buy a thermal immersion circulator to pull this off, but that's easy (and $400 +).  Granted, then you would own a thermal immersion circulator and that's pretty badass, so if you want to go that route, go right ahead.  I'll admit I'm jealous.

If you look up The Perfectly Cooked Egg in google, most of what you get is instruction on how to hardboil eggs correctly.  While that's fine, a hardboiled egg is in no way shape or form The Perfectly Cooked Egg.  (Can we agree to call it TPCE from know on?  Good.)

Now, if you want to really get into the science, you could go read some Harold McGee and learn all kinds of cool things you never knew about eggs and pretty much anything else you might want to eat.  Mr. McGee is a much better resource than I am, so I'm telling you, go read his stuff, not mine.

Ok, so you can't commit to the hardcore cooking science that Harold drops.  No problem.  Here's the basics.  Egg whites thicken at 145 F.  Egg yolks thicken at 150 F.  When I say thicken, what I'm really saying is they begin to coagulate.  The proteins solidify and shortly thereafter begin to get tough and/or rubbery.  The egg is no longer perfect.  For a well cooked egg (not well done, but cooked well), you should never raise the temperature above 150 F, less you start to coagulate the yolk.  Anything above that temperature is going to overcook the egg.   Notice I did not say that is TPCE.  For the TPCE, you must make sure that the temperature never exceeds 145 F.  But that is not all.  You have to make sure the temperature does exceed 140 F, lest you end up with TPUE (The Perfectly Uncooked Egg).

Sound easy?  Good.  Let's keep going.  Not only do you have to raise the temperature to between 140 and 145, you need to hold it there for an extended period of time.  45 minutes is about right, but go for 2 hours or more if you're feeling confident.  This ensures that the egg reaches this temperature all the way through, but does not exceed this temperature anywhere throughout (particularly on the outside - by the outside I mean the inside part of the egg nearest the shell, lest you were confused).  Raising the temp to 140 for 5 minutes will kill off any salmonella that might be lurking around.  (I should take a moment to state that I am by no means an expert and most of what I say has the potential to be patently false, but I'm going to say it anyway.  If you're worried about eating undercooked eggs, keep on enjoying your sulpherous green-yolked hard boiled eggs.)  Also at 140, one of the proteins in the egg white will begin to coagulate.  Though it is but a small portion of the overall white (let's call it 12% of the egg white protein...let's also assume that I'm wrong about that, but not by much.  It's not all that important anyway.  What is important is that...) this will bind the egg together into creamy custardy white.  The egg white won't fully coagulate until somewhere around 180 or so.  Test this if you must, but first ask yourself why.  This is not the important part.   

Now, this is the important part.  You might be wondering how to pull this off.  New York Wunderkind David Chang taught me this trick.  Not personally, mind you, but I did read his book.  Mr. Chang convinced me that I could attempt TPCE (though he neglected to call it TPCE, preferring to refer to it a slow poached egg).  Anyway, fill the biggest pot you have (or if you have an excessively large pot, a large pot that would be representative of the size of the largest pot most people might have...let's call it 6 quarts and use your best judgement) with water.  Place on the smallest burner you have and start heating.  Drop in a candy thermometer, and better yet, a thermal probe.  Wait until it gets to 140.  Fahrenheit.


Meanwhile get some eggs.  Fresh eggs.  Happy eggs.  Eggs that just got laid.  If you're going to go through the trouble to perfectly cook an egg, you want it to be a pretty good egg to start with.  Old eggs tend to have large air bubbles inside and have lost some of their moisture content.  Really old eggs will float.  This is a bad sign.  If you can get eggs from a friend, farmer, or your own chickens, do so.  Only go grocery store if you must. I should note that throughout this article I am referring to chicken eggs.  That's a good point to make, lest you try quail eggs or duck eggs and get a different result.  If you do try other eggs, let me know how it works.  I'd like to know.  Also, if you want to try an ostrich egg you will probably want to use the excessively large pot I said earlier was unnecessary and cook your egg for well beyond 45 minutes.  I'll say 3 hours.  But trust me, I have no idea what I'm talking about.  Anyway, you've got your eggs?  Good.  Take them out of the fridge and let them start to come up to room temperature so they don't go into shock when you put them in the water.


Once the water reaches temperature (140 remember), put something in the bottom to keep the eggs off of the bottom of the pot.  I rolled up an aluminum foil donut and placed a plate on top.  It worked great and held the eggs right in the middle of the pot.


This is it.  You've made it this far.  Now is the time on Sprocket's where we dance.


The water is hot, but not so hot that you can't put your hand in it to gently set the eggs down.  If you're more comfortable, use a spoon, just don't crack an egg.  The temp may drop slightly when you add the eggs (in the shell).  That's ok, let it come back up to temp.  Once it reaches 140 F start your timer for 45 minutes.  Do not let the water drop below 140.  Do not let the water exceed 145.  Control your burner.  Add an ice cube now and again if you need to.  Just keep it in control.  Aim for 143.  And don't overcompensate or you'll be chasing yourself every which way.  Just set it and monitor.  Only adjust if absolutely necessary.  Also, monitor the temp at the level the eggs are sitting in the pot.  The bottom of the pot is likely hotter than the point halfway up where your eggs should be sitting.


After 45 minutes you can safely remove the eggs.  Feel free to go longer.  As long as you maintain temp, there's really no harm, and what's your time really worth anyway?  Use immediately, or do like I did and place immediately into an ice water bath to cool rapidly.  Store in the ice water bath in the fridge for up to a day or two.


When you are ready to use, submerge the egg in very hot tap water for about 1 minute (if cooled...if using immediately you can skip this step).  This is where you get to show off.  Crack the shell.  Inside is a perfectly cooked egg.  Creamy white, completely liquid yolk.  Delicious.  Cracking an egg and opening it up to a find a poached egg is pretty cool.  Even cooler is cracking the egg tableside and dropping The Perfectly Cooked Egg right on top of your guests dish as the finishing touch.  


So now you've got The Perfectly Cooked Egg, or at least the best facsimile of one that you can obtain.  What the hell do you do with it?  Well, you can always just eat it.  Maybe a little bit of salt and pepper would go well.  Also, it's great for fried rice.  Along with the Banh Mi's I discussed previously, I served Jean-Georges Vongerichten's ginger garlic fried rice.  Basically, soften up some leeks in canola oil. Add cooked rice.  Rather than an egg over easy, I topped each with The Perfectly Cooked Egg.  Fried rice is better with a rich gooey yolk on it.   Sprinkle some crispy fried garlic and ginger on top and drizzle with a little soy sauce and sesame oil. 
 

Serve to friends and loved ones, or those that you wish to be friends and loved ones.  I'm sorry. I don't know what that means.  Just feed some nice people.